
K is for Kapok: The South American Alphabet Project
2 CommentsBy Lostcheerio on Monday, November 05, 2007 at 10:56 PM.
Today, Phi Bensa Zoe Academy's junior class resumed its study of the alphabet via South America, to go along with the Spanish studies they are pursuing with Veronica.
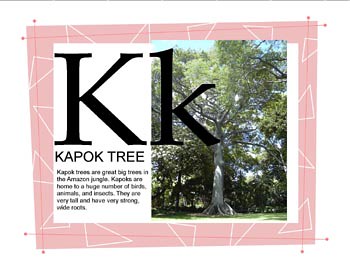
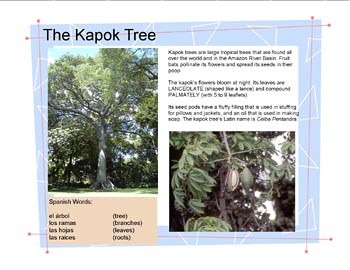
Here are the new pages for the South America workbooks:
Junior:
Senior:
Here's our Kapok tree lesson!
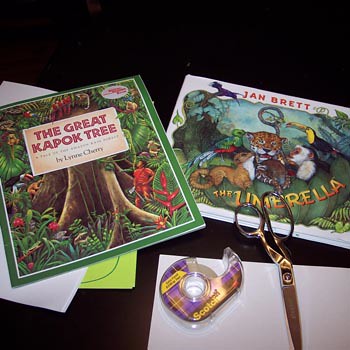
1) We read these two books.
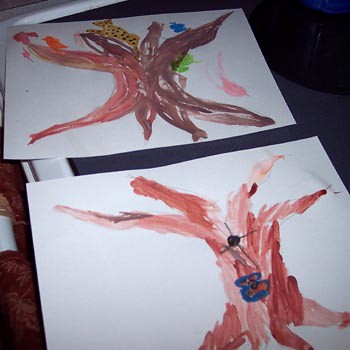
2) We painted Kapok trees with no leaves on it, but lots of animals inhabiting them! I drew the tree outlines with pencil and during the painting we concentrated on doing brush-brush-brush instead of scrubbing the brushes around. Both of them did very well filling in their areas, and we had three different watercolor shades of brown to help them get the feel for shading.
3) Cut out lots and lots of big broad leaves for the animals to hide under. Phillip did GREAT with the scissors. Sadie needs me to be her left hand, turning the paper while she operates the scissors.
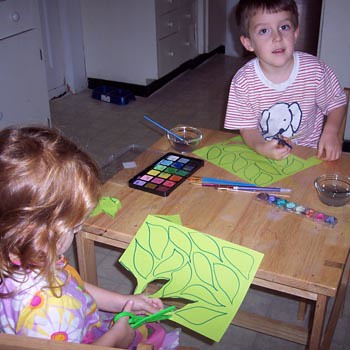
4) Tape the leaves onto the trees like little flaps, so that you can lift them up and see the hidden animals inside.
What is WRONG with me that I didn't take pictures of the final products! Imagine the trees above with a whole bunch more leaves stuck all over the place.
We concentrated on learning the names of the animals in the book, and on getting that brush technique down, and on precision cutting. A good day.
Here are the new pages for the South America workbooks:
Junior:
Senior:
Here's our Kapok tree lesson!
1) We read these two books.
2) We painted Kapok trees with no leaves on it, but lots of animals inhabiting them! I drew the tree outlines with pencil and during the painting we concentrated on doing brush-brush-brush instead of scrubbing the brushes around. Both of them did very well filling in their areas, and we had three different watercolor shades of brown to help them get the feel for shading.
3) Cut out lots and lots of big broad leaves for the animals to hide under. Phillip did GREAT with the scissors. Sadie needs me to be her left hand, turning the paper while she operates the scissors.
4) Tape the leaves onto the trees like little flaps, so that you can lift them up and see the hidden animals inside.
What is WRONG with me that I didn't take pictures of the final products! Imagine the trees above with a whole bunch more leaves stuck all over the place.
We concentrated on learning the names of the animals in the book, and on getting that brush technique down, and on precision cutting. A good day.
Labels: alphabet, lessons, phi bensa zoe, preschool, south america
More Homeschool for Girls: A Useful Flower Printable
1 CommentsBy Lostcheerio on Monday, September 03, 2007 at 11:07 AM.
I was doing letter practice with Sadie the other day, and as we were playing around with our crayons and paper, I made this:

Here's how it worked. I put a letter in a box, then she copied it into the neighboring box. When she accomplished this, she got to draw a petal onto the flower. When there were ten petals on the flower, she was done. She loved it.

I liked it too and thought I might like to use it again, so I made a digital version of it for reprinting.

If you click here you can go to a bigger version of the image, that you can print. Make sure you go to Page Layout or Print Options or whatever and choose "Landscape" before you print it out. If you use it, and like it, send me a picture of it! :D
Possible uses:
Letter practice. Copy what Mommy writes, or write the letters yourself in upper and lower case in the two boxes.
Number practice. Copy what Mommy writes, or write the numbers in yourself, twice to 10 or once to 20.
Violin/piano practice. Put the song names in the boxes and color the petals for every song you do. Choose ten boxes to practice.
Task list. Put 20 possible jobs in the boxes and let the child choose 10 to accomplish for the week, for each job accomplished fill in a petal.
Schedule for the day. Make a list of everything, everything, everything you're going to do today in the left boxes. Have child fill in the right boxes with everything she wants to do. Each put five top priorities in the petals.
Happy Labor Day
Here's how it worked. I put a letter in a box, then she copied it into the neighboring box. When she accomplished this, she got to draw a petal onto the flower. When there were ten petals on the flower, she was done. She loved it.
I liked it too and thought I might like to use it again, so I made a digital version of it for reprinting.
If you click here you can go to a bigger version of the image, that you can print. Make sure you go to Page Layout or Print Options or whatever and choose "Landscape" before you print it out. If you use it, and like it, send me a picture of it! :D
Possible uses:
Letter practice. Copy what Mommy writes, or write the letters yourself in upper and lower case in the two boxes.
Number practice. Copy what Mommy writes, or write the numbers in yourself, twice to 10 or once to 20.
Violin/piano practice. Put the song names in the boxes and color the petals for every song you do. Choose ten boxes to practice.
Task list. Put 20 possible jobs in the boxes and let the child choose 10 to accomplish for the week, for each job accomplished fill in a petal.
Schedule for the day. Make a list of everything, everything, everything you're going to do today in the left boxes. Have child fill in the right boxes with everything she wants to do. Each put five top priorities in the petals.
Happy Labor Day
Labels: free, lessons, preschool, printables
Make a Silver Seashell Frame: A Preschool Craft with Shells from the Beach
0 CommentsBy Lostcheerio on Tuesday, August 28, 2007 at 9:41 AM.
Last week at Phi Bensa Zoe Academy, our homeschool mini-co-op, the junior class did a math/art/nature project that resulted in a picture frame decorated in painted shells. Of course, with preschoolers, it's all about the process.
Step 1: Wash the shells.
I had a big bucket of shells that were pretty much straight from the beach. Sand in them, bits of seaweed, random ocean gunk, etc. I put the bucket in the sink and turned on the water. Sadie and Phillip washed the shells and each chose a bowl full to use in their projects.
This was definitely the kids' favorite part of the whole thing. They liked clinking their hands around in the bucket of shells and water, they liked picking out different variations of color and shape, and we talked about the creatures that had inhabited the shells, why they were shaped how they were shaped, why they were sandy, why some had ridges and some didn't, etc. The nature lesson was good, but I think the tactile sensation was better.
Step 2: Paint the shells.
When they had their shells picked out, I laid paper towels on the table and set their bowls next to their workspace. They each chose ten shells, which we laid out in a row and numbered, then ten more, another row, then ten more. We counted to thirty, we counted by ten to thirty, we talked about three groups of ten making thirty, and we exploited the math moment in other ways. Then we painted.
Painting shells is complicated because of the ridges. We tried, with varying degrees of success, to paint with the ridges rather than across them, to make an even, smooth layer of paint. We also tried to cover the whole shell.
We used pearl white and metallic gold paint, and then came behind with silver and gold glitter paint. I like glitter paint 50 times better than shaking loose glitter onto glue. It's so much easier to control, so much less messy, and so much less likely to get into your eye and drive you crazy for the rest of the day.
Step 3. Arrange the Shells on the Frame.
After the kids chose their favorites and organized them on the frame, I came behind with a glue gun and attached the shells. We used an unfinished wooden frame, which we later varnished with spray varnish, because the glue and the shells will stick better to an unpainted wood surface than to paint or shellac.
Another example of the quiet, private nature of homeschool learning. Looking at the finished frame, some silvery shells stuck onto a wooden rectangle, you don't see the math, the marine biology, the joy in the tactile sensation. While school teachers have to focus on deliverables, proofs, and evidence, the homeschool teacher has her own experience, her own memory, her own relationship with the project and the moment, and there's no one to prove it to, no need to quantify it.
Of course the homeschool teacher also has her homeschool blog where she occasionally does record it, quantify it, and provide all the evidence she likes.
Step 1: Wash the shells.
I had a big bucket of shells that were pretty much straight from the beach. Sand in them, bits of seaweed, random ocean gunk, etc. I put the bucket in the sink and turned on the water. Sadie and Phillip washed the shells and each chose a bowl full to use in their projects.
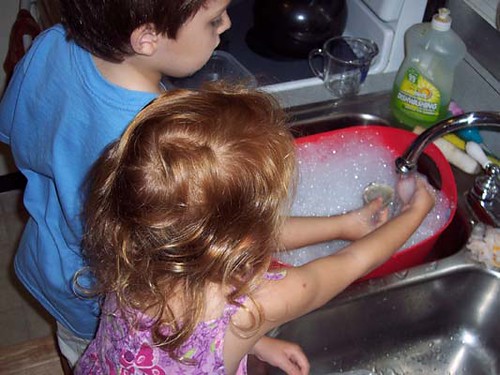
This was definitely the kids' favorite part of the whole thing. They liked clinking their hands around in the bucket of shells and water, they liked picking out different variations of color and shape, and we talked about the creatures that had inhabited the shells, why they were shaped how they were shaped, why they were sandy, why some had ridges and some didn't, etc. The nature lesson was good, but I think the tactile sensation was better.
Step 2: Paint the shells.
When they had their shells picked out, I laid paper towels on the table and set their bowls next to their workspace. They each chose ten shells, which we laid out in a row and numbered, then ten more, another row, then ten more. We counted to thirty, we counted by ten to thirty, we talked about three groups of ten making thirty, and we exploited the math moment in other ways. Then we painted.
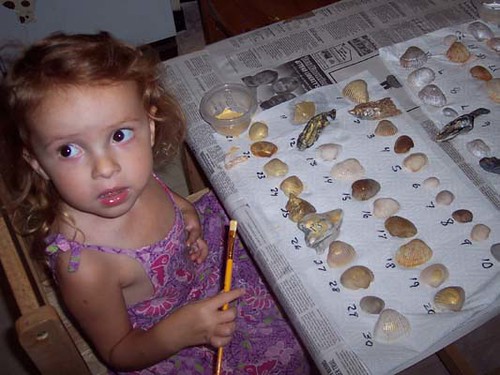
Painting shells is complicated because of the ridges. We tried, with varying degrees of success, to paint with the ridges rather than across them, to make an even, smooth layer of paint. We also tried to cover the whole shell.
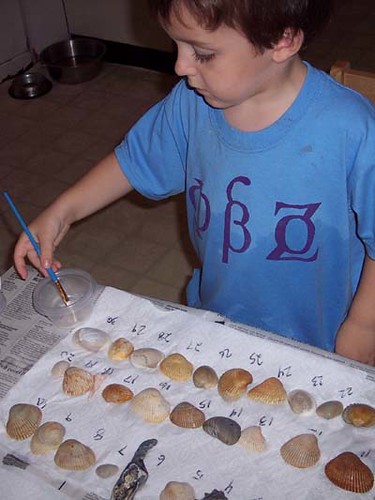
We used pearl white and metallic gold paint, and then came behind with silver and gold glitter paint. I like glitter paint 50 times better than shaking loose glitter onto glue. It's so much easier to control, so much less messy, and so much less likely to get into your eye and drive you crazy for the rest of the day.
Step 3. Arrange the Shells on the Frame.
After the kids chose their favorites and organized them on the frame, I came behind with a glue gun and attached the shells. We used an unfinished wooden frame, which we later varnished with spray varnish, because the glue and the shells will stick better to an unpainted wood surface than to paint or shellac.
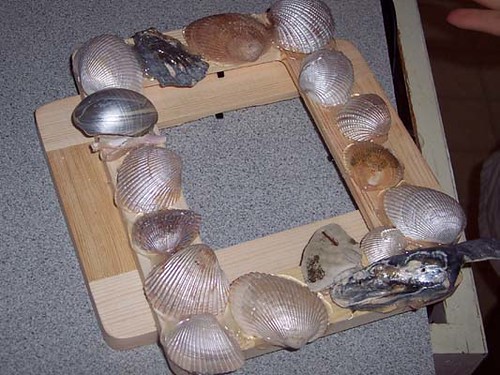
Another example of the quiet, private nature of homeschool learning. Looking at the finished frame, some silvery shells stuck onto a wooden rectangle, you don't see the math, the marine biology, the joy in the tactile sensation. While school teachers have to focus on deliverables, proofs, and evidence, the homeschool teacher has her own experience, her own memory, her own relationship with the project and the moment, and there's no one to prove it to, no need to quantify it.
Of course the homeschool teacher also has her homeschool blog where she occasionally does record it, quantify it, and provide all the evidence she likes.
Labels: children, counting, crafts, kids, painting, phi bensa zoe, preschool, projects, shells

 Subscribe in a reader


